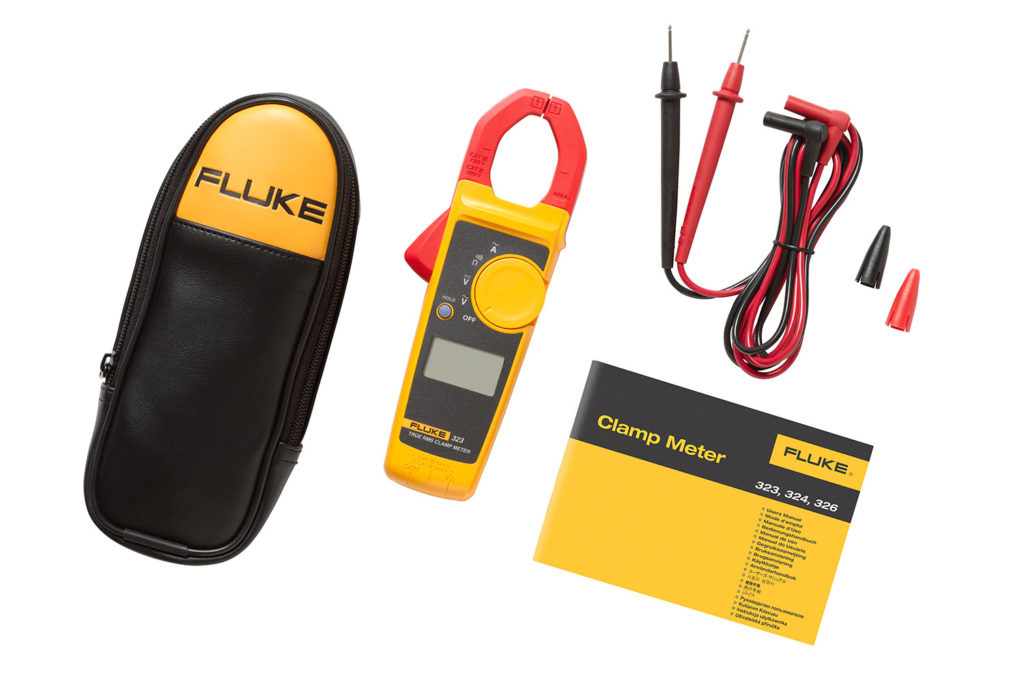
The Usage and Components of Fluke Clamp Meter 323
The Fluke 320 series True-RMS clamp meter measures current up to 400A AC and voltage up to 600V AC/DC. This product is designed to verify the presence of load current, AC voltage, and continuity of circuits, switches, fused, and contacts. It also offers DC and frequency measurements and is supplied with test leads, a soft case and a user manual. Among the Fluke 320 series, Fluke 323 is top-notch choice for you to get great and accurate results and this is the most trusted and recommended device by professionals. Learning how to operate a clamp meter is straight forward and it will become easier if you follow the guide while experimenting it. After meeting the clamp meter, the star of all multimeters, you are thinking of owning this clamp meter. Hold your horses, you must know first how this clamp meter works that will help you to identify if this is the right device for you.

Before we jump into how use the Fluke clamp meter. We will go over and be familiarize with the components of Fluke clamp meter 323. Let’s start with The Clamp, a jaw like structure which is wound around conductors to detect and measure. Tactile barrier – Protects your fingers and hands from shocks. Dial – Change quantity and resolution. Display screen – Usually LCD. Min-max button – To measure the highest, lowest, and average magnitudes of quantities. Inrush current button – Negates inrush current from your measurement. Shift button – To select more functions on the dial. Lever – Used to release the jaw. Alignment marks – The conductor should ideally be between these two marks. Now, you are ready to use the Fluke clamp meter 323.
Steps to Follow While Using a Fluke Clamp Meter 323
Step 1. Switch ON the meter and make sure to remove the probes if they are attached.
Step 2. Select the quantity (current, AC, DC, voltage, continuity and frequency) that you would like to measure using the dial. The display should show a jaw sign, which will confirm that the measurement is being detected through the clamp.
Step 3. Open the jaw-like structure using the side lever and insert the conductor through which the quantity is to be measured. Technicians can do this with their secondary hand so that measurements can be noted down using the primary one.
Step 4. Then close the jaw-like structure and level the conductor between the alignment marks inscribed on the jaws.
Step 5. The display will show the appropriate reading. Users can change the resolution as per requirements, but most meter models do this automatically.
Useful Tips While Using a Clamp Meter
For all the beginners out there, it may be tough to use this device on your first project, so we also have some useful tips to help you with your work using a clamp meter.
- Always use a clamp meter on a single conductor specifically when measuring current. Never clamp around two conductors at the same time as the current passing through them will cancel each other.
- Always wear industry-grade safety gloves while operating a clamp meter
- Disconnect the test probes/leads before using a clamp meter to measure current using the jaws
- Always keep your fingers behind the tactile barrier
- It is recommended to use the “zero” function while measuring DC current, which removes DC offset from the measurement, giving accurate results
- When readings seem inaccurate, always check the function selected first before checking anything else
In the end, this fluke 323 clamp meter is one of the best choices for you if you are looking for a professional clamp meter. Not only It has one ability, but it also includes a multimeter. It is an ideal troubleshooting tool for commercial and residential electricians. You don’t have to be an expert to be able to use this clamp meter you just need to follow the steps on how to use it to get an accurate result at the same time making sure that you are using it safely.
