Guide on Using Fluke TiS20 Thermal Camera
Fluke Thermal imaging cameras are able to produce a crisp image in the darkest nights. These tools are ideal for those looking to carry out predictive or preventative maintenance. It is a non-contact device that detects infrared energy and converts it into a visual image. Fluke Thermal imaging cameras are perfect for a variety of tasks due to their high quality Imagery, useful functions and above all, unwavering accuracy. The reliability of these tools is the main reason why it is the most recommended unit by the technicians and it led to a worldwide reputation of quality and consistency. There are different models available from Fluke, with variety of features and benefits. Fluke TiS20 Thermal Camera is one the talk of the town thermal camera. Seems promising, right? But before going to the nearest store and get your own Fluke TiS20 Thermal Camera, let us help you understand how this unit works and some tips and tricks that you never know.
Before using the Imager for the first time, charge the battery for at least two hours. The imager’s battery condition is displayed in the upper left corner of the display. When the last segment of the battery icon extinguishes, the Imager will shut down and require recharging it before using it again.
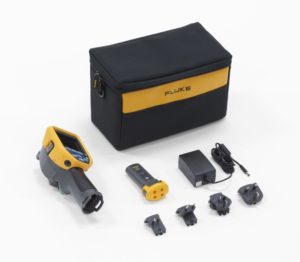
Charging the battery
To charge the Imager’s battery, plug the ac input of the battery charger into the power outlet, then plug the battery charger’s dc output into the Imagers ac adapter socket. The battery icon appears while the Imager is operating while when its off a signal icon will show up on the screen. Keep the Imager attached to the charger until the batter condition icon indicates a full charge. Removing the Imager from the charger before a full charge is it may affect the battery life of the device or it will shorten the run time of the tool.
Power on and off
To power on and off the image, push and hold the power button for 3 seconds. All thermal Imagers need sufficient warm-up time for the most accurate temperature measurements and best image quality for a minimum of 10 minutes.
Adjusting the Thermal Image
Before capturing an image, you may adjust the thermal image. The Imager uses different color or shades of gray to display the temperature gradient of the area within the Imager’s field of view. There are two adjustments for changing how the Imager displays the image; Palette or Range.
Focusing and Capturing an image
Point the Imager at the object of area of interest, focus by turning the focus control until the image displayed on the LCD is clear as possible, then pull and release the trigger. This will capture and freeze the image. The Imager displays the captured image and a menu. Pressing the softkey labeled Settings allows modification of image characteristics such as palette, picture-in-picture, and range.
Edit and Save Captured Infrared Image
Before you save a file, use the imager to edit or modify the image. You can add IR-Photonotes, a text or other information that is related to the analysis and reporting of the infrared image. Voice annotation, and text annotation as well as change the palette and IR Fusion mode. A Bluetooth headset is needed and the radio must be enabled for voice or audio annotation. To save an image as data file you will need to push F1 button to save the image as afile and go back to live view.
Maintenance and Battery care
The imager supplies maintence-free operation. However, some precautions should be followed to get the best and longest performance. Wipe the case with a damp and a mild detergent. Do not use abrasives, isopropyl alcohol, or solvents to clean the case or lens/window. To get the best performance from the imager’s battery, do not store the imager connected to the charger more than 24 hours it may reduced battery life. Charge the imager for a 2-hour minimum at least every six months to maximize battery life. Without use, the battery will self-discharge in approximately six months.
The quality associated with Fluke TiS20 Thermal Camera is present throughout the entire range. Fluke focus on performance, both in their cameras and accessories. You will never be disappointed with the standard of their Thermal camera as long you know how you can use them properly that will help the tool last long.
